Gaming Galleries
| Beginners Guide |
|||||||||||||||||||||||||||
|
This
guide is for the vanilla game with no Mods or DLC's and intended to
offer playability advice for beginning players and veteran players
alike. The following
information is from personal experience from over 800 hours of game
play. All three modes of the game have been experienced and explored. This section contains no
spoilers to
the main Campaign
This guide in no way
dictates
the only way to play
Below are three sections on how to dominate on the battlefield including;
|

| Campaign
vs Career If this is your first time playing, definitely go with the Campaign first. This sets up what you start with when you do go for the Career mode. At the end of the Campaign, you automatically switch over to Career mode keeping everything you acquired during the campaign but without the travel limits. At the start of the Campaign, you will also get a brief tutorial that cannot be skipped. It is the lead up to important events and mayhem in the very near future. |
|
| Character Background
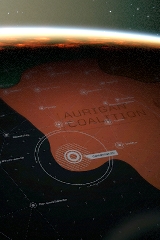
and Difficulty Settings You will be presented with screens to set the background history for your Character. These include where your family came from and your upbringing. You can see the Faction Map here to better understand the region layout. Read through each of the Background screens and select a path that best fits your play style. Very little here has an impact on the game and the character customization is very basic. |
|
|
For the most part, leave options as 'normal' and check boxes turned off. Here's what some of these options mean; [need citation]
[Unequipped 'Mechs] OFF When whole Battlemechs are assembled from salvage parts, default loadouts are not included, just an empty chassis.
[Parts for 'Mech Assembly] Parts needed to complete a whole Battlemech. 3 is typical and already difficult with all the 'Mech variants available.
[Randomized Starting 'Mechs] ON/OFF Will give two or three Light 'Mechs or two or three Medium starting 'Mechs.
['Mech Destruction] OFF When on, Battlemechs defeated in battle are completely destroyed and no component salvage is available.
Current Credits/Money
Upcoming Events
STORE AND BLACKMARKET
Each planet has a store where you can purchase or sell whole 'Mechs, parts, weapons and components. Your Reputation within that particular sector will effect the price you pay. Friendly factions will give you a 5% discount, while honored will be 10%. Of course that works the other way and you are charged more for goods when not on good terms with that faction. This discount/markup does NOT effect pricing when you sell your extra 'Mech parts, weapons or components and will always be the base price. You will always pay far more then what you can sell items for.
If you have gained favor with the Pirate Organization, usually accompanied by a recurring 'membership fee', a separate store may be available in certain systems. These Black Market stores will have rare 'Mech parts or weapons and components for sale that are only available in these stores.
HIRING HALL
Here you can recruit new pilots to your ranks. Most will be marginally trained MechWarriors with few abilities, while others can have excellent stats and are known as Veterans or Elites. There are rare exceptional pilots that can randomly appear and may be 'Special' or 'Unique' in nature. Special pilots are usually contributions by players from the Kickstarter Campaign, while Unique pilots are Ronin pilots from the development team.
Background details should not be overlooked. Not only will the pilots ancestry be seen, by also what jobs they had in the past that could benefit your Merc Company. As an example, a pilot with technical training may be able to assist in the 'Mech Bay or may have connections to the local pirate organization. Random travel events may be helped or hampered by what traits pilots from your crew may have.
Once hired, you'll be able to see what traits they have. See Pilot Quirks for how Trait benefits or penalties effect game play.
| Personal Pet-peeve |
| Rare, critically important components and 'Mechs are typically only
found in Black Market stores. And the only way to access them is being
at least 'Friendly' with the local Pirates. Many of the missions are
against the Pirates as they are an enemy of everyone. This means you have to carefully balance what missions you accept. In the beginning, this will be difficult, as choices are limited and advancing in the game will be real struggle. If you don't have access to quality weapons and components, you'll have only low level missions. |
CONTRACTS
In this section is where you can see available Mission Contracts. Each entry will give a title along with the faction offering the contract and difficulty rating. It also shows the maximum they are paying and how any salvage will be divided up. For the Max Salvage, the first value (priority), is the number of items you may choose from the available loot. The second value is the total items you will receive, selected at (semi-)random. Hovering over the icons and mission type above the description will reveal mission goals and environmental effects. Cooler climates offer better heat dispersal, while deserts and badlands will make generated heat harder to manage.
Again, this is a game about salvage. You will get a better gross income by having high salvage rights. 'Mech parts are far more valuable and should be the first items you select from the salvage list. But, be sure to scan the entire list as there may be rare items that are hard to pass up. The higher the Salvage rights, the more random items ('Mech parts, weapons, ammo and components) you receive, making your gross income exceed what you would normally get paid, by double or more.
MECHWARRIORS |
||
 |
Merry Band of
Mercenaries The initial MechWarrior crew are misfits and oddly can't be customized. Always check the Hiring Hall for run of the mill pilots if you want to be able to customize your Merc Company. There is no special bonus or skill perks for 'special' MechWarriors. So if you want a custom crew, dismiss the initial ones and hire new pilots. Do it early as not to waste the XP on pilots you plan to dump. Special and Unique pilots are rare but can be found at various Hiring Halls. List of Pilot Perks or 'Tags' have no barring on combat but may effect certain Travel Events. [citation: Jamie Wolf] |
|
| Skills- Once you activate a
skill to the bonuses, it will lock out other skill trees. You can only
have 2 primary bonuses and one secondary within the primary. Experience Points- Each Mechwarrior that takes part in a mission will receive 500 xp for each half difficulty level of the mission. A two Service Record- Reveals the Mechwarriors affiliations, skills and perks. Here you can also see their monthly salary and the injury level they can withstain. Customization- Most generic Pilots can be customized, including name changes, hair, skin tones and voice used. Here you can also Dismiss a pilot from your service, but may appear at a Hiring Hall again. Unique or Special MechWarriors once Dismissed will no longer be available. MEMORIAL WALL View any deceased MechWarriors |
* Don't advance your Pilots beyond level 4 until you have reviewed the Advanced Strategies section of this guide. *  |
| Your
initial Lance will vary slightly depending on the Background and
Options selected, but will be similar. Several Light 'Mechs and a
couple Medium 'Mechs, including the one the character starts with. In
the Mech Bay tab, familiarize yourself with each 'Mechs weapons,
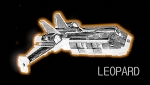
strengths and weaknesses. The Leopard dropship, your landing craft, has
6 available 'Mech bays initially, but are never upgraded to hold more. You will need a bigger ship for that. |
|


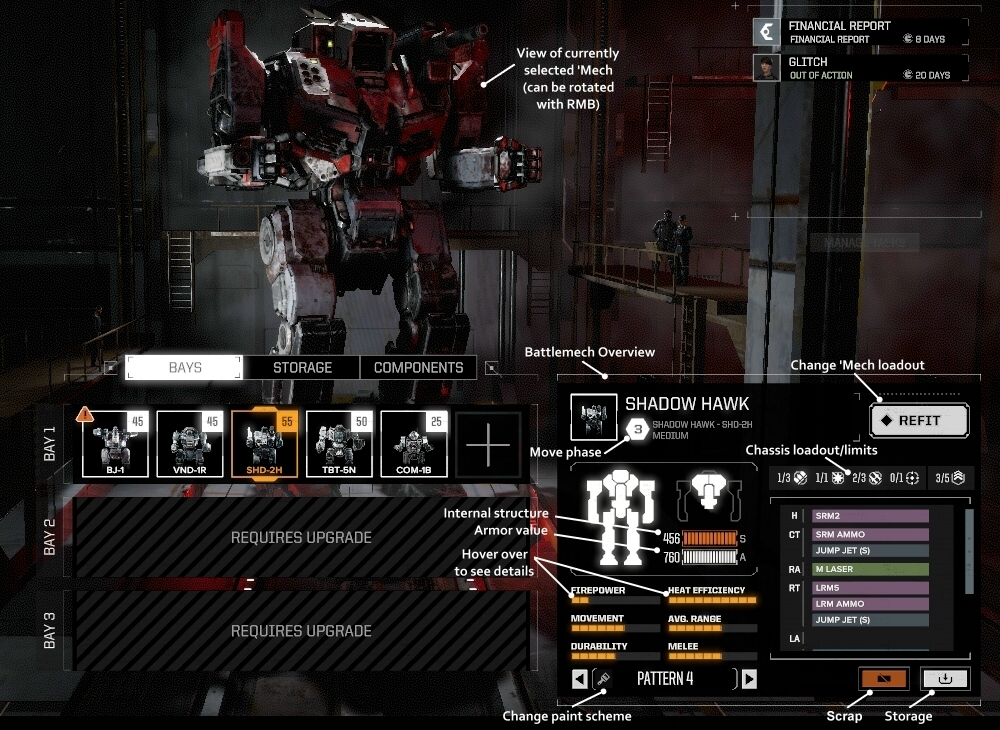
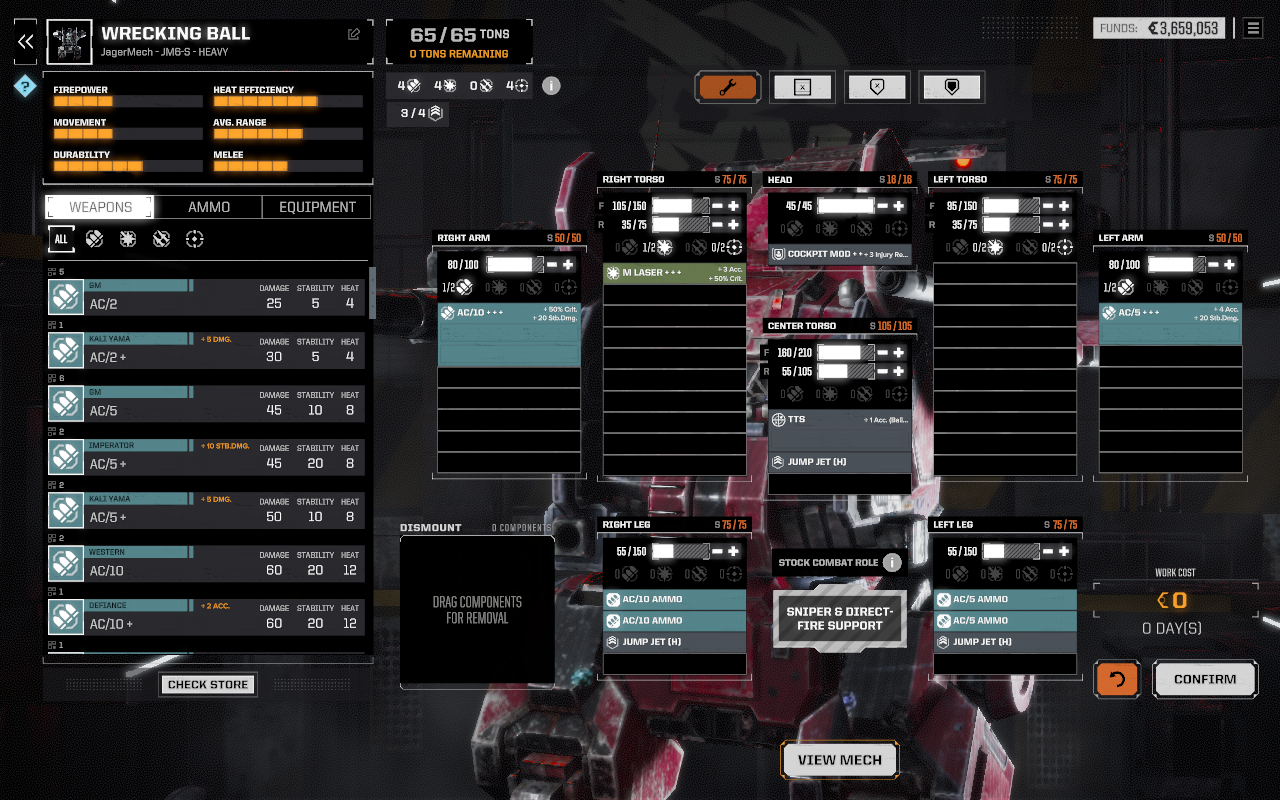
'Mech Roster - A general Mech Overview in the lower right, shows basic stats and load-out. The Move phase shown in the hexagon with a number indicates the 'Mechs inititive based on Weight Classes. The higher the number (1-5) the earlier the 'Mech acts in each combat round. Also shown is the front and back Armor value (white) and Internal structure (orange) which are the 'Mechs hit points.
Chassis loadout/limits in the row of numbers and symbols indicate Ballistic, Energy, Missiles, Support and Jump Jet slots a Battlemech chassis has/allowed. The bar graphs are an indication of it's combat strength and when hovered over with the cursor, will show further details. A scrolling list shows where each weapon and component is located.
Selecting the Scrap button will 'sell' the selected 'Mech with a confirmation message and C-Bills you will receive. The Storage button will remove all weapons and components and move the 'Mech into your storage where it can be sold at the Store or added back to your roster at a later time. You can also Change the paint scheme from several pre-selected styles.
REFIT Window;
| Mech Weight Classes | |
| Light (20-35) Medium (40-55) |
Heavy (60-75) Assault (80-100) |
* I highly recommend moving all Ammo from the Torso and Arms to the Legs. *
This is where you can change or upgrade the 'Mech from the list of available parts in your inventory. The inventory groups are; Weapons, Ammo and Equipment which can be narrowed down to type in the selectors below the inventory tabs. The 'Mech name can be changed by clicking the current name and typing in a new one.
Move components you wish to remove to the Dismount Box. Use removed components first to save time and money. If you are in orbit of a planet, you can access the local Store to purchase or sell weapons and components.
Weapons;
AC-Auto Cannon
Large Lasers
Medium Lasers
Small Lasers
PPC-Plasma Particle Can.
SRM-Short Rng. Missiles
LRM-Long Rng. Missile pod
Flamers
Ammo;
Auto Cannon rounds
Short Range Missiles
Long Range Missiles
Equipment;
Cockpit Modules
Gyro stabilizers
Heat sinks
Heat banks & Exchangers
Jump Jets
Leg/Arm Modifications
TTS-Targeting Systems
View 'Mech to see a rotatable 3D model of the 'Mech with several different views options.
| STAR MAP Cost is a set 30,000 C-Bills per jump leg. |
View Sector Map here |
|
| Travel Moving between planetary systems is performed by ComStar Jumpships utilizing the lost technology (LosTech) of folding space. These Jumpships are located at specific points in deep space where this folding of space can happen¹. This requires ships wanting to jump to a different system to travel from the planet base or starbase to where the Jumpship is located. This can take many days using conventional propulsion. Dropships, such as the Leopard, that are docked to the Jumpship move great distances by folding space and arriving instantly in a different solar system many light years away. ComStar charges a set amount of 30,000 credits for each ship making the jump with them. * Be sure to schedule any repairs or upgrades in the 'Mech Bay before starting your travel. * There may be random events that happen during the days long trip to the Jumpship. Most give you multiple choices based on the conditions and crew. If one of your Mechwarriors has a trait that would help/hinder the event outcome, they will be included in the options presented. |

¹ These
specific locations may just be arbitrary and only used
because
a successful jump was made at that point at some time in the past.
ComStar simply doesn't know if other locations are also viable. The
scientists that figured out the mechanics of folding space, were also
targeted during the Secession Wars and the knowledge was lost.
|
|
FINANCES
Ship Status including Morale effects.
Operating costs- 'Mechs=12,000 each, Ship Upgrades=350-8500 each, Salaries based on rarity, rank and skill levels
REPUTATION
Mercenary reputation effects what MechWarriors are available in the Hiring Hall based on your Merc Review Board score. Some pilots will require you to have a higher Reputation score to be hired.
CUSTOMIZE COMPANY
Including outfit name, color scheme and crests. Here are instructions for adding you own custom crests to BattleTech.

NEXT: Advanced Strategies; Early and mid game Battle Lance configurations. Do this before advancing Mechwarrior skills beyond level 4!
|
|
Step 1: Find or create new emblem or crest image and save down Step 2: Invert image (so it appears upside down) Step 3: Convert (if necessary) to .dds format (must be a DDS image) Step 4: Go to folder; i) For steam users: SteamGames>steamapps>common>BATTLETECH>BattleTech_Data>StreamingAssets>emblems>player ii) For non steam users, find your BATTLETECH folder: BATTLETECH>BattleTech_Data>StreamingAssets>emblems>player Step 5: Copy the name of an emblem you plan on swapping out Step 6: Move that emblem/picture to a backup folder Step 7: Paste in your custom emblem image (DDS format) Step 8: Rename your image (paste) the name of the emblem you deleted (this is important or it won't show up) Step 9: Open BATTLETECH go to Captains quarters and select your new custom emblem! :Remember that if you 'verify installed files' through Steam, your custom emblem(s) will get replaced: Special thanks to Shadowcoast at Steam Guides for the detailed instructions | 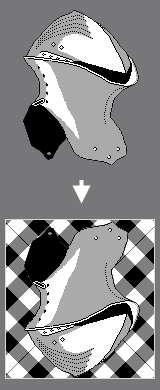 |
©
Copyright Krown Products Ltd. 2008-2026
All rights reserved
All rights reserved